> For the complete documentation index, see [llms.txt](https://help.gpmloginapp.com/llms.txt). Markdown versions of documentation pages are available by appending `.md` to page URLs; this page is available as [Markdown](https://help.gpmloginapp.com/gpm-login-global-en/gpm-login-global-user-guide/proxies.md).
# Proxies
{% hint style="info" %}
***GPMLogin tip:*** Do you need detailed instructions? Watch the video on our official channel [**YouTube Channe**](#user-content-fn-1)[^1]**l**
{% endhint %}
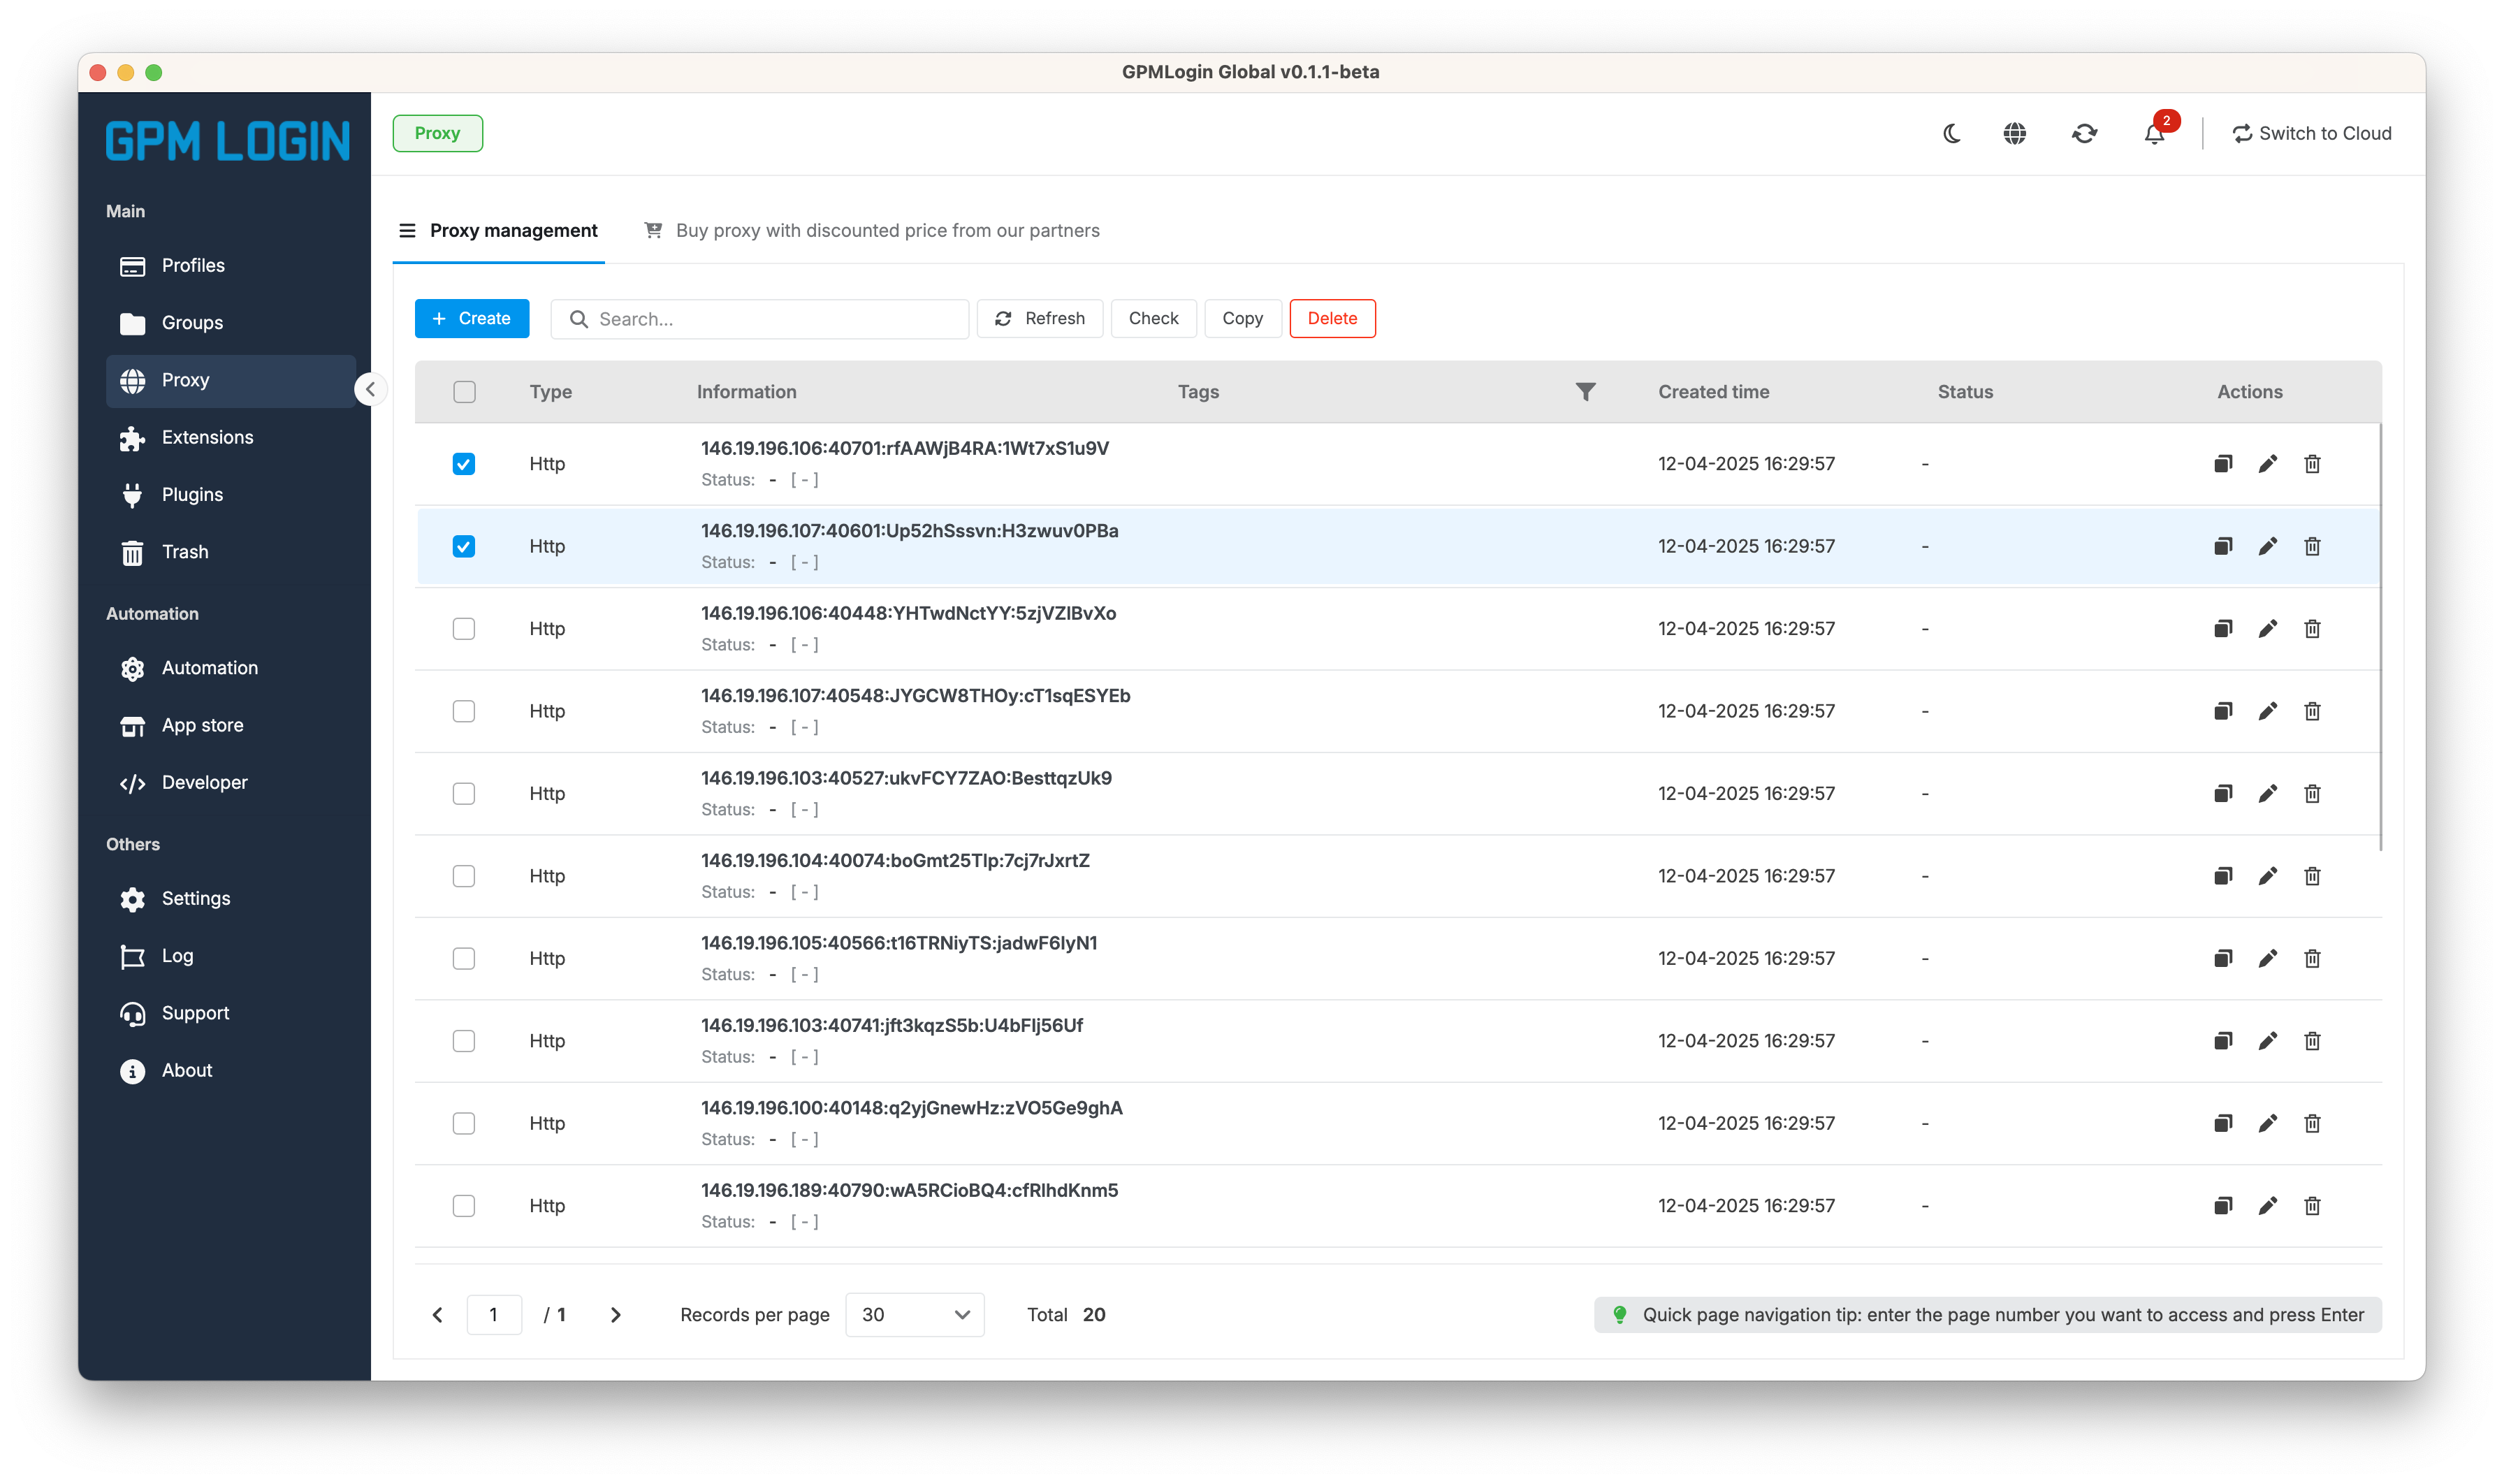
### 1. Thêm mới Proxy (Add Proxy)
Hệ thống hỗ trợ nhập Proxy hàng loạt với các định dạng phổ biến như HTTP, HTTPS, SOCKS4 và SOCKS5.
Các bước thực hiện:
1. Tại menu bên trái, chọn mục Proxy
2. Nhấp vào nút + Thêm Proxy (Add Proxy) ở góc trên bên phải màn hình.
3. Trong cửa sổ hiện ra, dán danh sách Proxy của bạn vào khung văn bản. Bạn cần nhập mỗi Proxy trên một dòng theo định dạng chuẩn sau:
```
IP:Port
IP:Port:Username:Password
```
Xem chi tiết hơn ở phần Profile cách điền proxy và cấu trúc proxy để thêm hàng loạt đúng cú pháp.
### 2. Kiểm tra trạng thái Proxy (Check Live)
Tính năng này giúp bạn loại bỏ các Proxy đã chết (Dead) hoặc tốc độ phản hồi quá chậm (Timeout) trước khi sử dụng.
Các bước thực hiện:
1. Trong danh sách Proxy, tích chọn vào ô vuông (checkbox) đầu dòng các Proxy bạn muốn kiểm tra (hoặc chọn tất cả).
2. Nhấn nút Kiểm tra Proxy (Check Live).
3. Hệ thống sẽ mất vài giây để ping đến các Proxy. Cột Trạng thái (Status) sẽ hiển thị kết quả:
* 🟢 Live (Xanh): Proxy hoạt động bình thường, kèm theo thông số Ping (ms).
* 🔴 Dead (Đỏ): Proxy không hoạt động hoặc không thể kết nối.
### 3. Gắn thẻ (Tag) để phân loại
Sử dụng Thẻ (Tag) là phương pháp tối ưu nhất để quản lý số lượng lớn Proxy theo dự án, quốc gia hoặc mục đích sử dụng.
Cách gắn Tag:
1. Tích Proxy cần phân loại.
2. Nhấp vào nút Gắn Thẻ (Add Tag).
3. Nhập tên thẻ mới (Ví dụ: `Proxy_US`, `Nuoi_FB`, `Ebay_Project`) hoặc chọn từ danh sách thẻ đã có.
4. Nhấn Xác nhận (Confirm).
> Lưu ý: Sau khi gắn thẻ, bạn có thể sử dụng thanh tìm kiếm hoặc bộ lọc (Filter) trích xuất nhanh nhóm Proxy theo Tag mong muốn. Hoặc Click vào Thẻ Tag để lọc nhanh proxy theo Thẻ Tag mong muốn.
### 4. Chỉnh sửa và Xóa Proxy (Edit & Delete)
Chỉnh sửa Proxy:
1. Tìm Proxy cần thay đổi thông tin trong danh sách.
2. Nhấp vào biểu tượng ✏️ Chỉnh sửa (Edit).
3. Cập nhật lại IP, Port, Username, Password.
4. Nhấn Lưu thay đổi.
Xóa Proxy:
1. Chọn một hoặc nhiều Proxy cần xóa bằng cách tích vào ô vuông đầu dòng.
2. Nhấn nút 🗑️ Xóa (Delete) trên thanh công cụ.
3. Cửa sổ xác nhận hiện ra, nhấn Đồng ý (Yes) để xóa vĩnh viễn dữ liệu khỏi hệ thống.
\
Phần proxy nằm trong phần quản lý này sẽ nằm trong phần thư viện proxy, khi tạo profile có thể chọn proxy từ đây để gắn cho profile.
[^1]:
---
# Agent Instructions
This documentation is published with GitBook. GitBook is the documentation platform designed so that both humans and AI agents can read, navigate, and reason over technical content effectively. Learn more at gitbook.com.
## Querying This Documentation
If you need additional information that is not directly available in this page, you can query the documentation dynamically by asking a question.
Perform an HTTP GET request on the current page URL with the `ask` query parameter, and the optional `goal` query parameter:
```
GET https://help.gpmloginapp.com/gpm-login-global-en/gpm-login-global-user-guide/proxies.md?ask=&goal=
```
`ask` is the immediate question: it should be specific, self-contained, and written in natural language.
`goal` is optional and describes the broader end goal you are ultimately trying to accomplish on behalf of the user. GitBook uses it to tailor the answer towards what is most useful for that goal.
The response will contain a direct answer to the question and relevant excerpts and sources from the documentation.
Use this mechanism when the answer is not explicitly present in the current page, you need clarification or additional context, or you want to retrieve related documentation sections.